SideBell · User Guide
The caregiver sets up both devices; the patient only has to tap a cell. The two chapters are independent — read the one for whichever device is in your hands. Set up the patient side first, so the connection comes up while you are setting up the second device.
- Before you start
- Chapter 1 · Patient side (the one beside the bed)
- Chapter 2 · Caregiver side (the one you carry)
- Two rules
- If something is wrong
Before you start
- Two Apple devices — one beside the bed (an iPad works best; the cells are large and easy to hit), one carried by the caregiver (usually an iPhone).
- SideBell installed on both. It is the same app; each device picks its role after installation.
- They cannot be too far apart. Only testing in your own home will tell you the real range — walls and floors both matter. Once you are set up, walk around and try it from the places you actually use.
Chapter 1 · Patient side
The device beside the patient. Once set up it stays on, and the patient only taps cells.
1Confirm the notice, allow Bluetooth
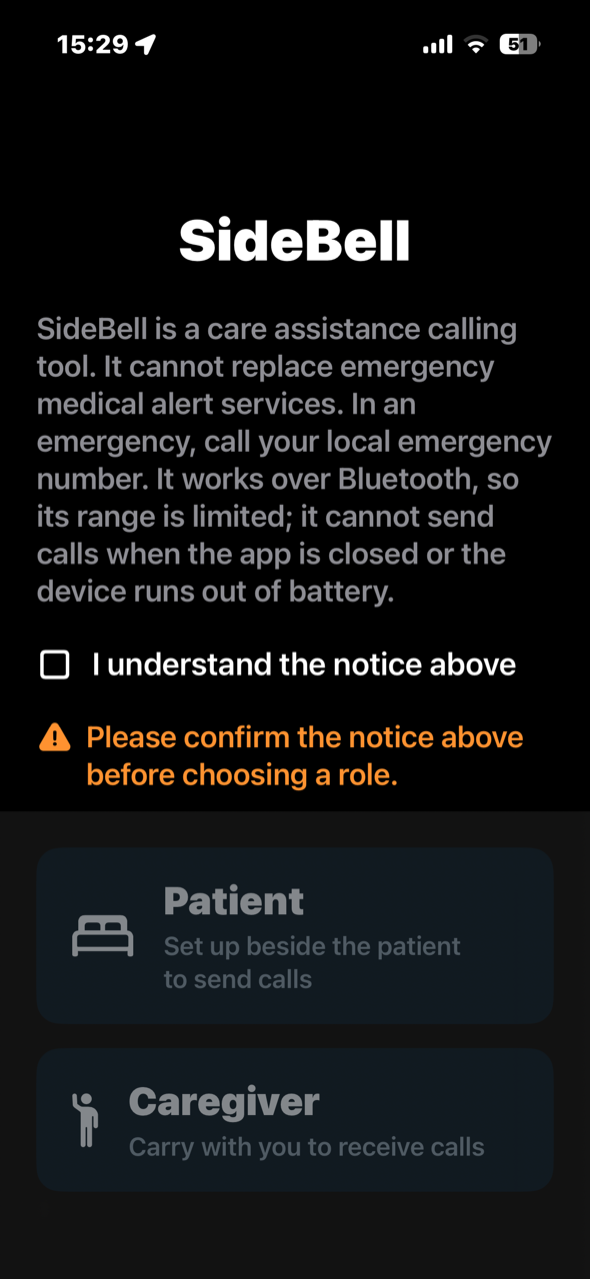
Open SideBell. The two role cards at the bottom are greyed out and will not respond.
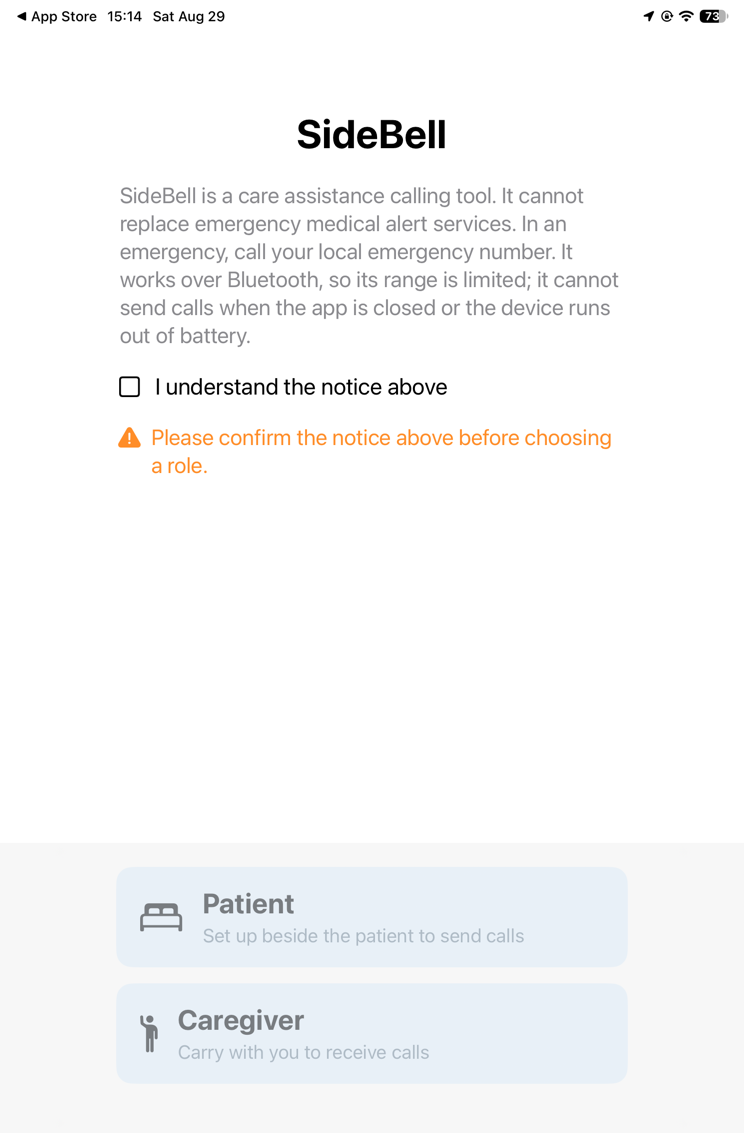
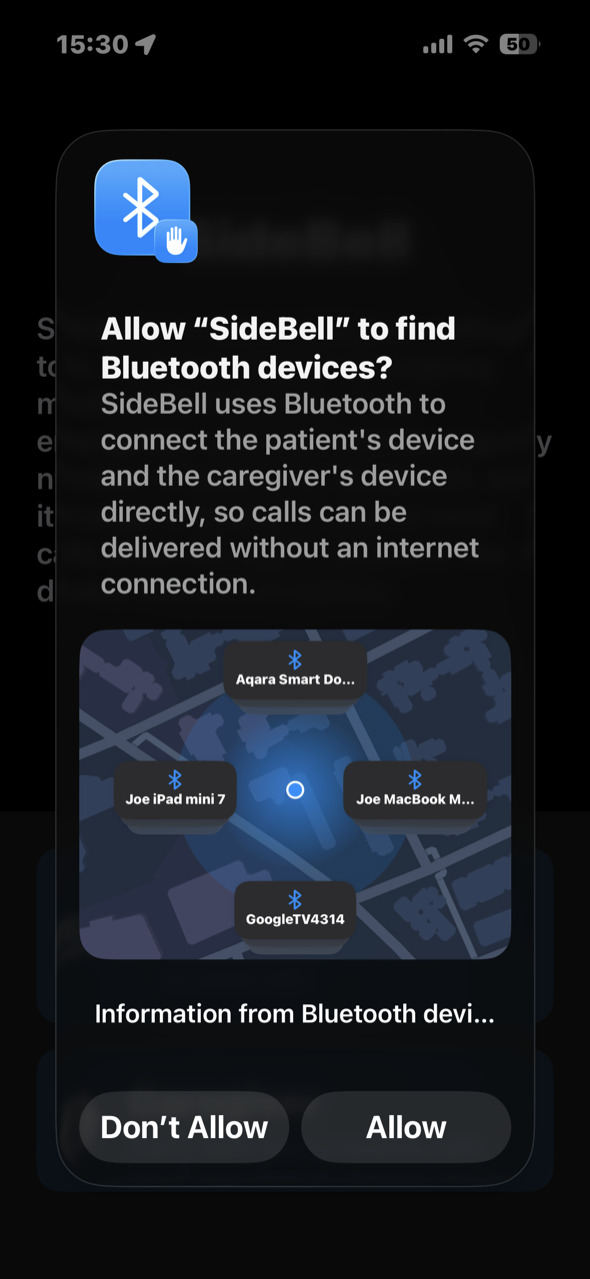
The moment you tick it, the Bluetooth request appears.
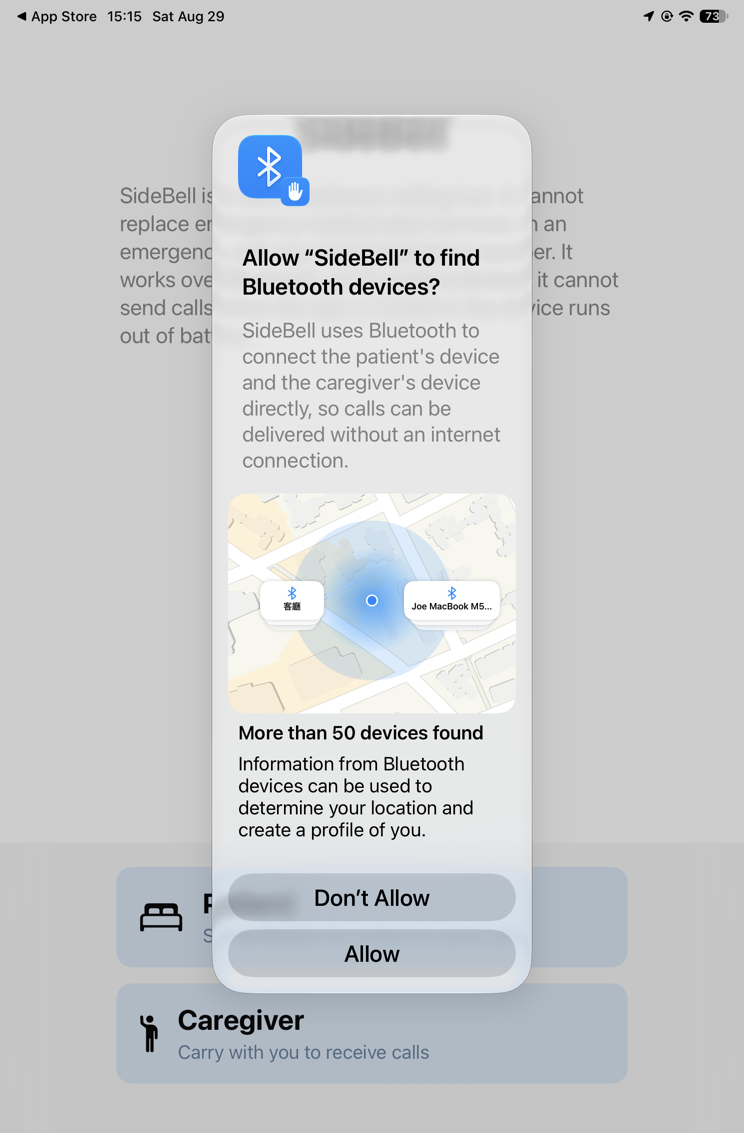
The patient side needs only this one permission. The caregiver side also asks for notifications.
2Choose the role
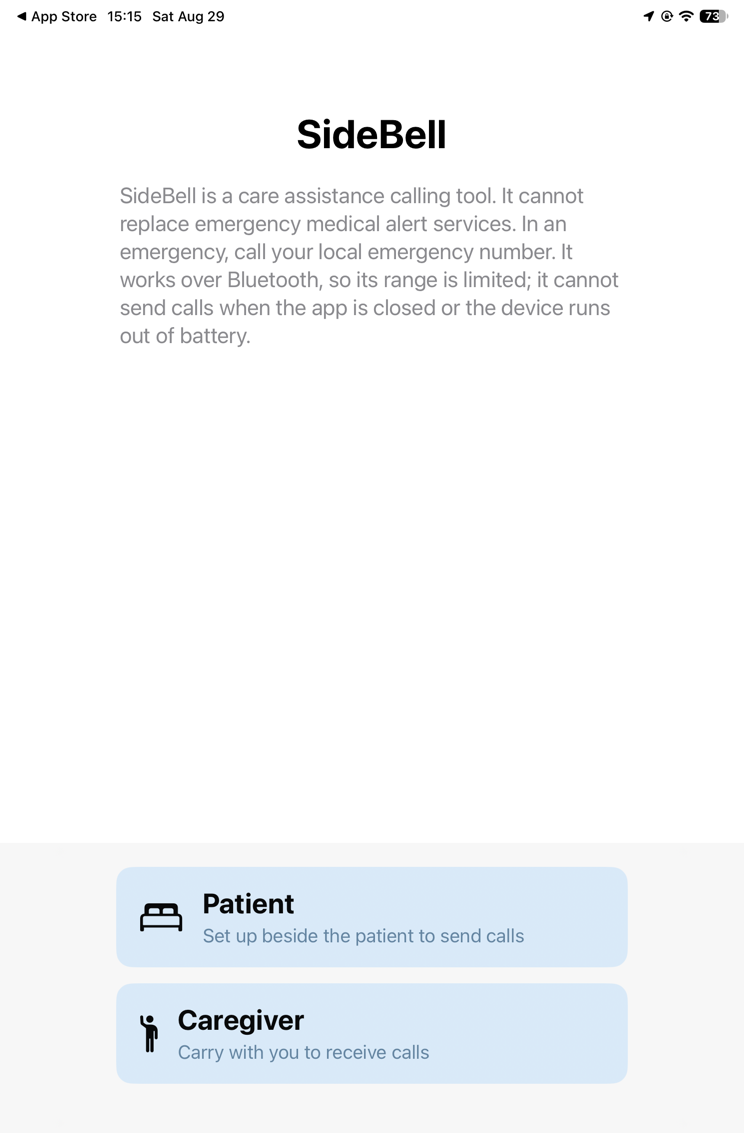
Choose Patient. If you pick the wrong one, you can switch it later in Settings.
3The main screen
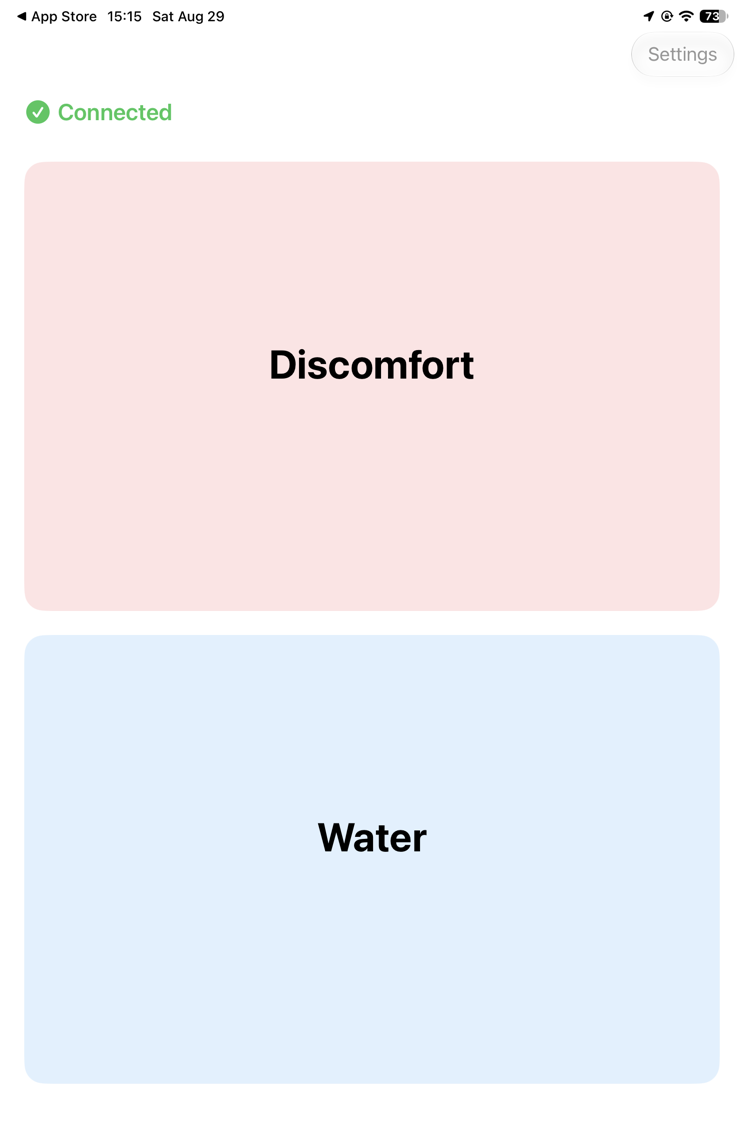
The connection state is in the top-left corner. The screenshot above shows it once both devices are ready. At this point in your own setup the caregiver side does not exist yet, so it will read Not connected in orange — that is expected. It turns green once the second device is done.
4Add the items this home needs
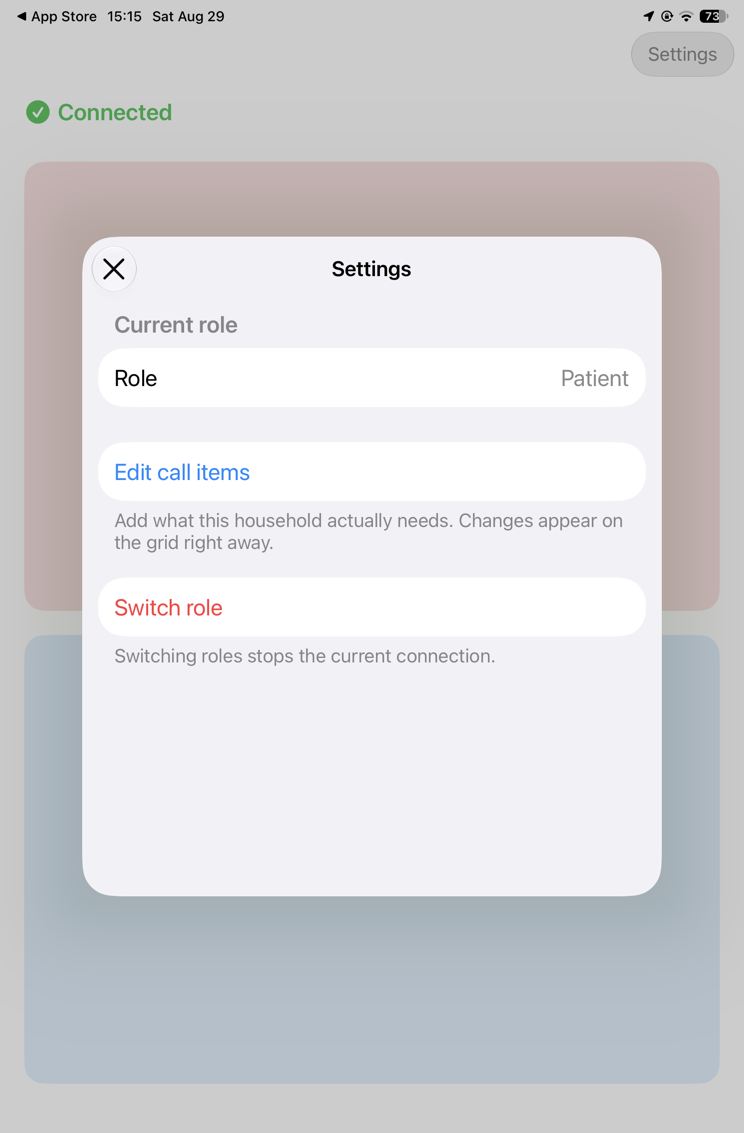
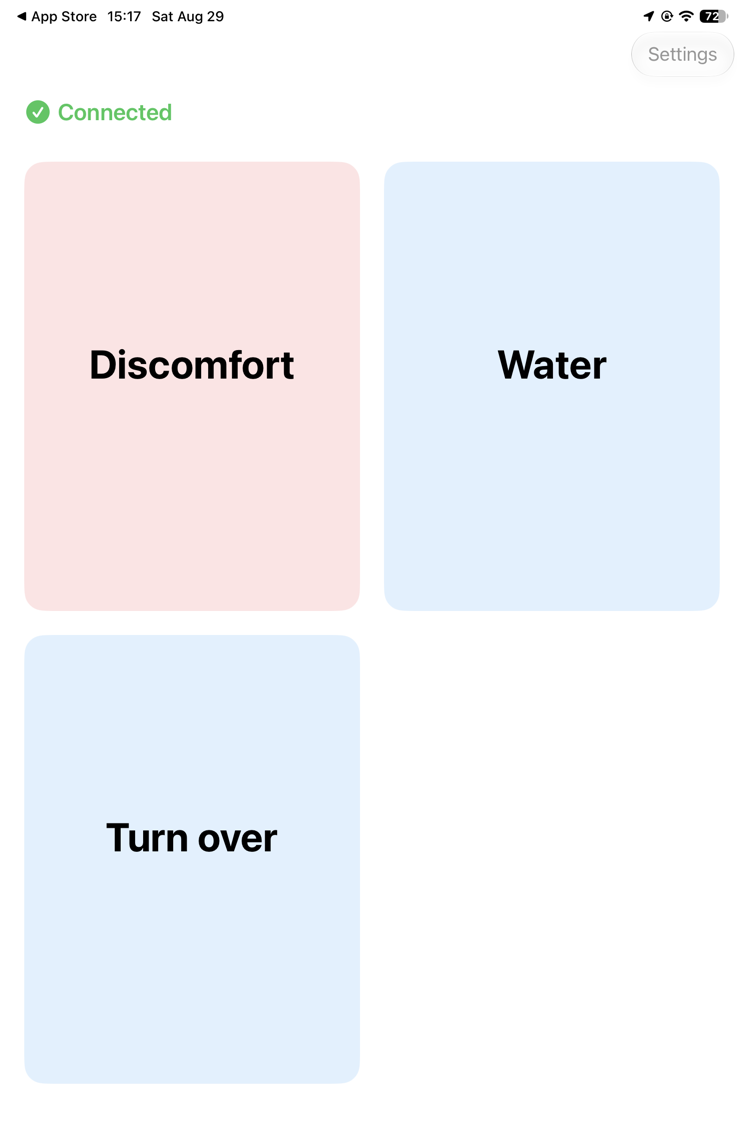
Only Discomfort and Water are there by default. Turn over, suction, bathroom, air conditioning, just want to talk — every household needs something different, and you can add your own.
Opening Settings takes two taps
Tapping Settings in the top-right corner once turns it into an orange Tap again. A second tap within three seconds actually opens it.
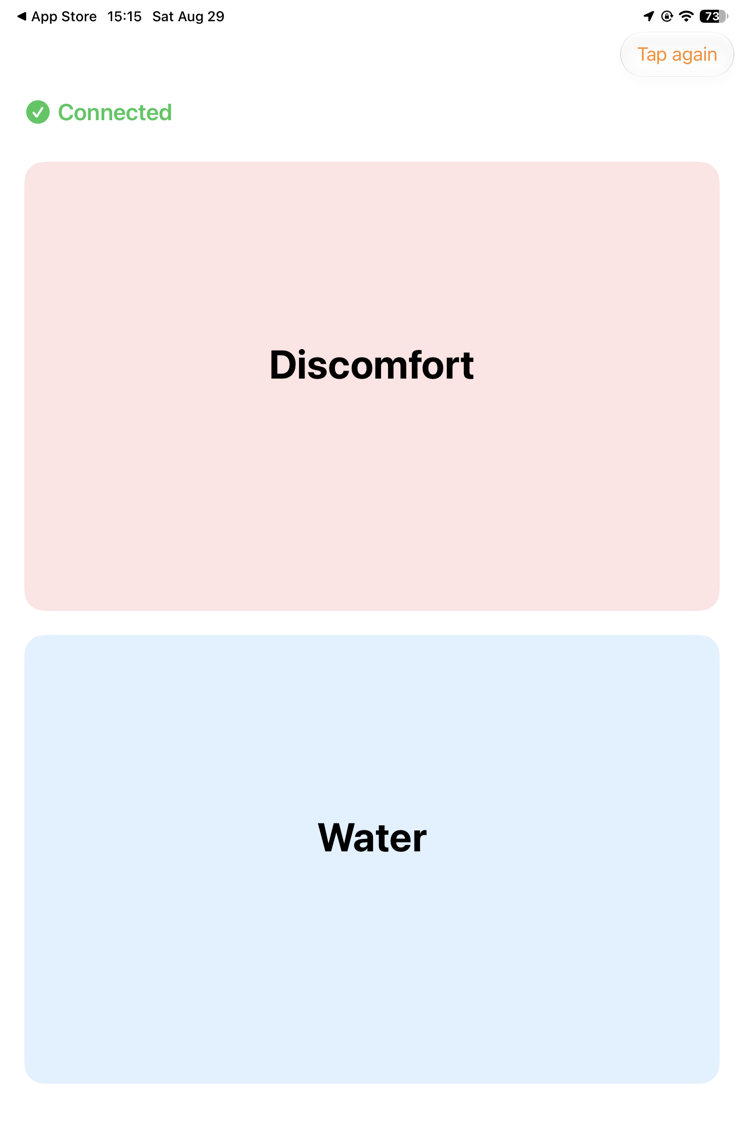
This exists to block accidental activation by Eye Tracking — a patient who lands in Settings by mistake may not be able to get back out on their own.
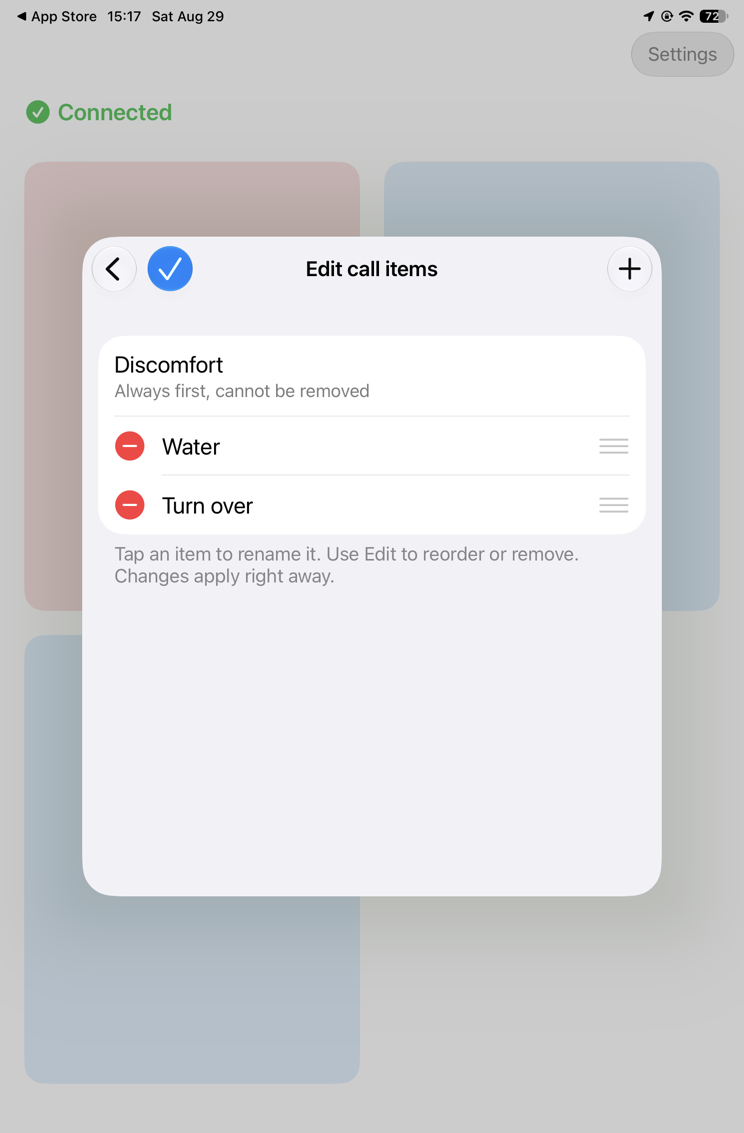
Edit call items
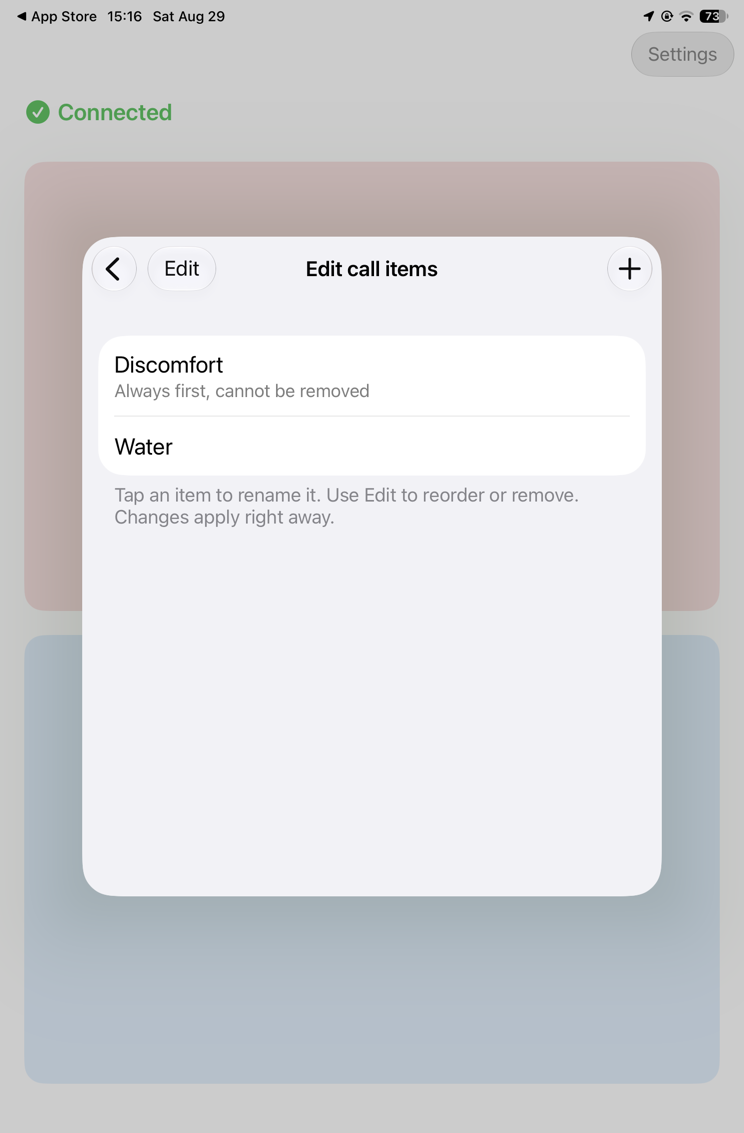
Adding an item
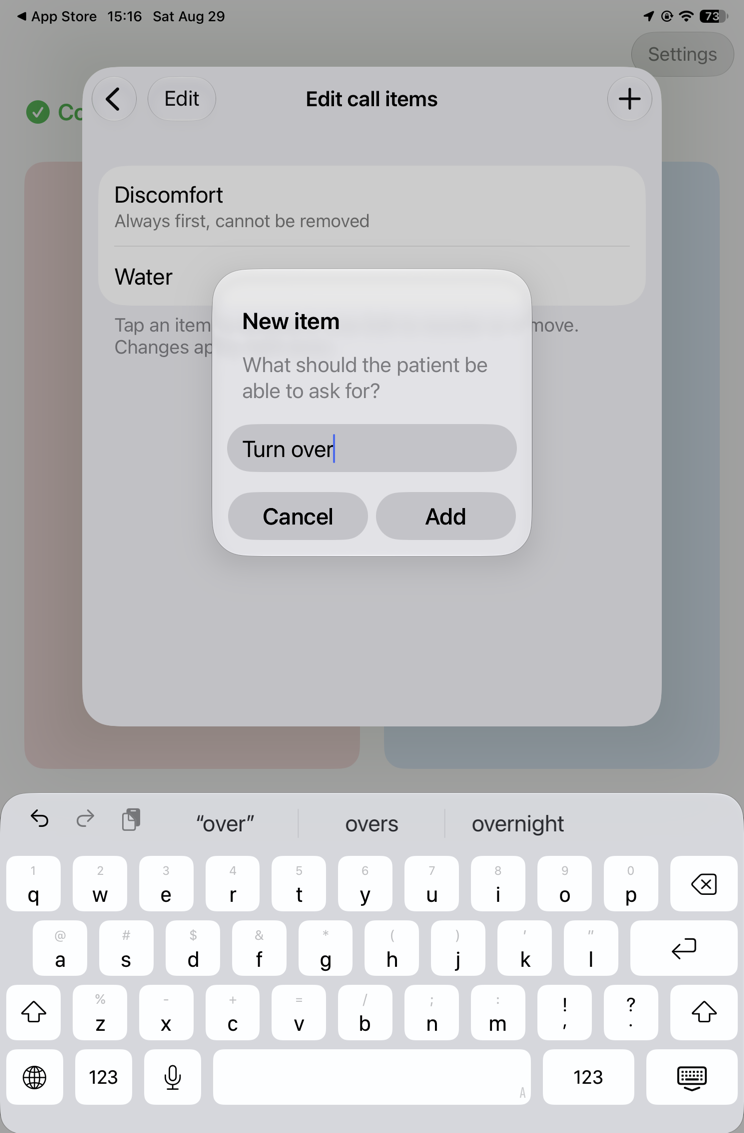
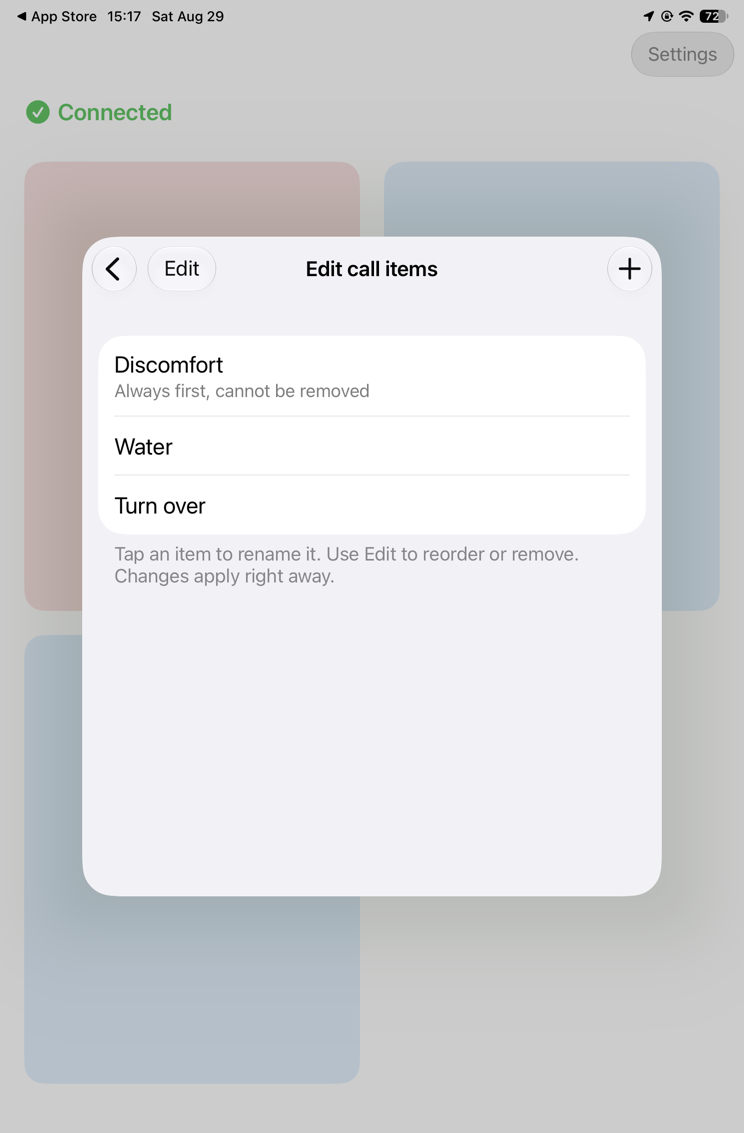
Reordering and removing
After adding
5After a cell is tapped
One of three states appears under the cell:
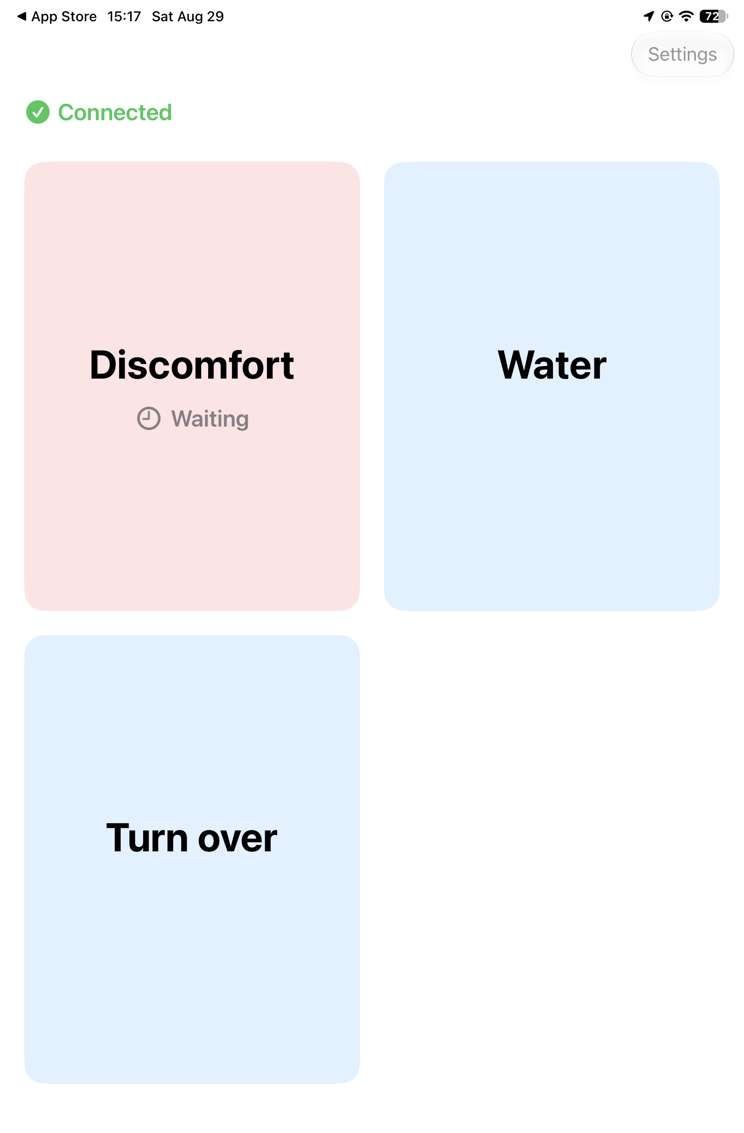
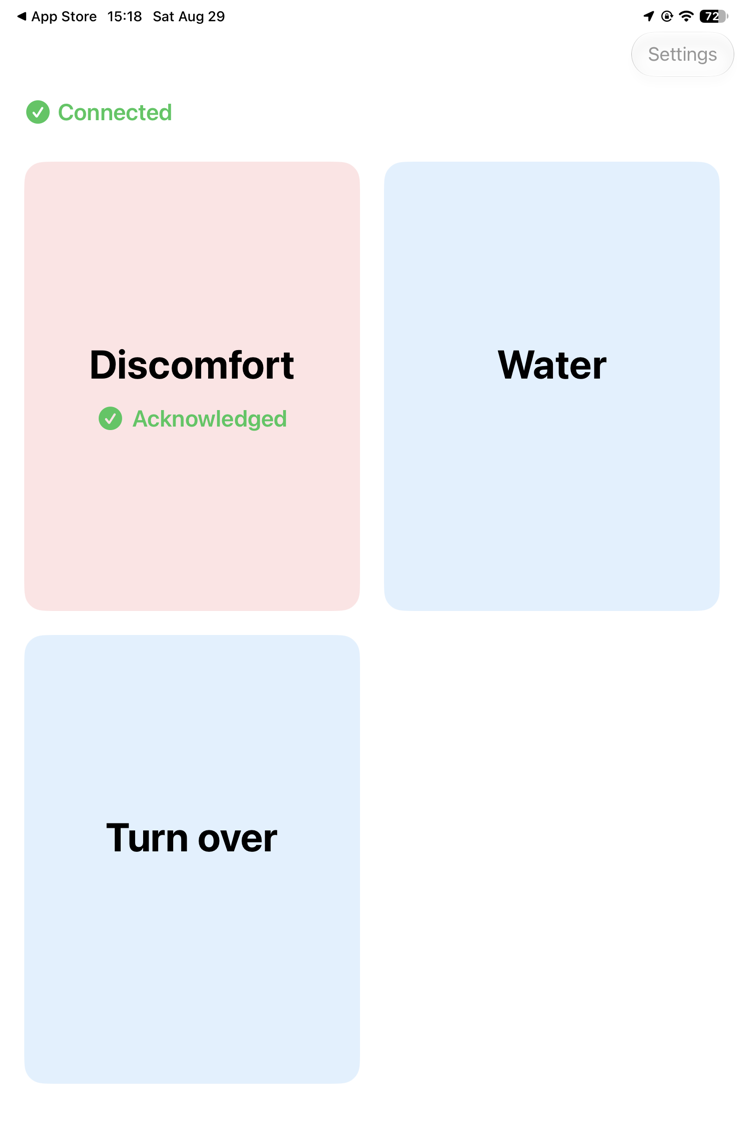
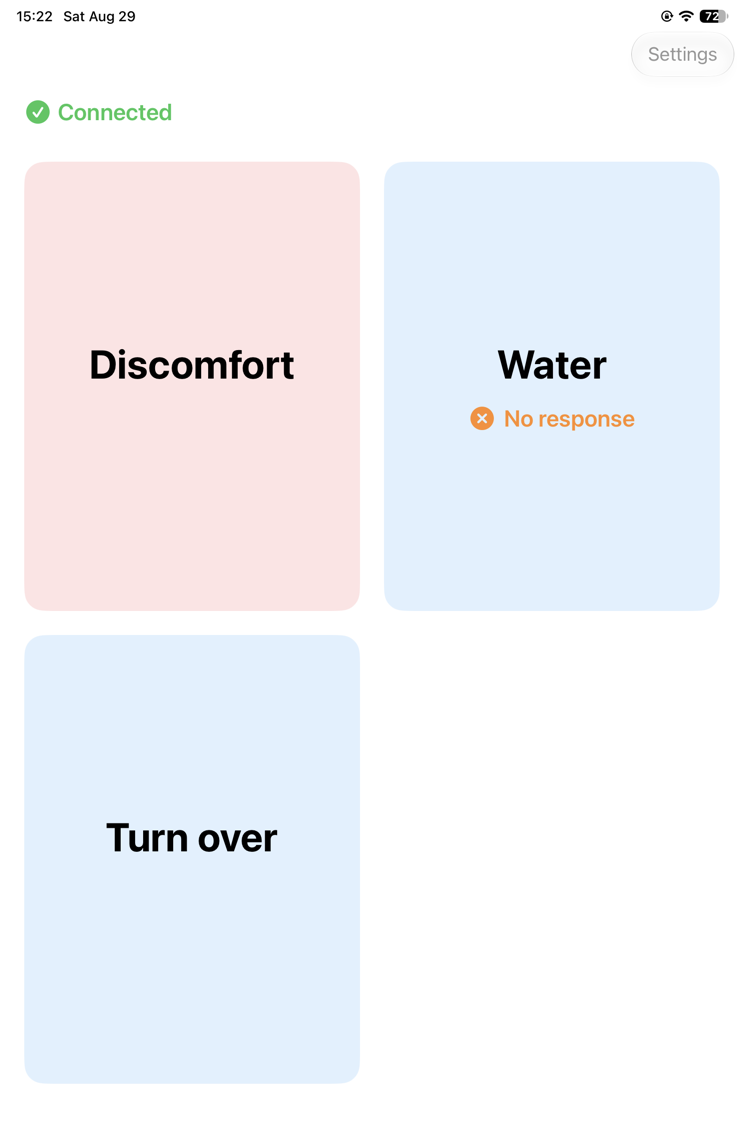
“No response” does not mean “not delivered”. The call may well have reached the caregiver’s phone and set off the alert — they were simply asleep or out of the room. What it means for the patient is the same either way: this route is not working right now, try another way to get help.
6Leaving it running beside the bed
Once everything works, the bedside device stays on. Three things are worth doing first.
Keep it plugged in
A flat battery means the whole system is offline, and the patient cannot go and charge it. Keep the bedside device on a charger permanently rather than treating it as a tablet someone picks up and carries off.
Turn on Guided Access
This locks the iPad into SideBell, so the patient cannot leave the screen by accident.
- iOS Settings → Accessibility → Guided Access, switch it on
- Go back to SideBell and triple-click the side button (or the Home button)
- Tap Start
Triple-click again and enter the passcode to end it.
Do not swipe the app away
Swiping SideBell out of the app switcher stops it working entirely, and the patient has no way to reopen it. That is an iOS rule, not a flaw in this app. With Guided Access on, it essentially cannot happen by accident.
Chapter 2 · Caregiver side
The device the caregiver carries, usually a phone. This is where calls ring.
1Confirm the notice, allow Bluetooth
Same as the patient side: tick “I understand the notice above” before the role cards become tappable.
2Choose the role
Choose Caregiver.
3Allow notifications
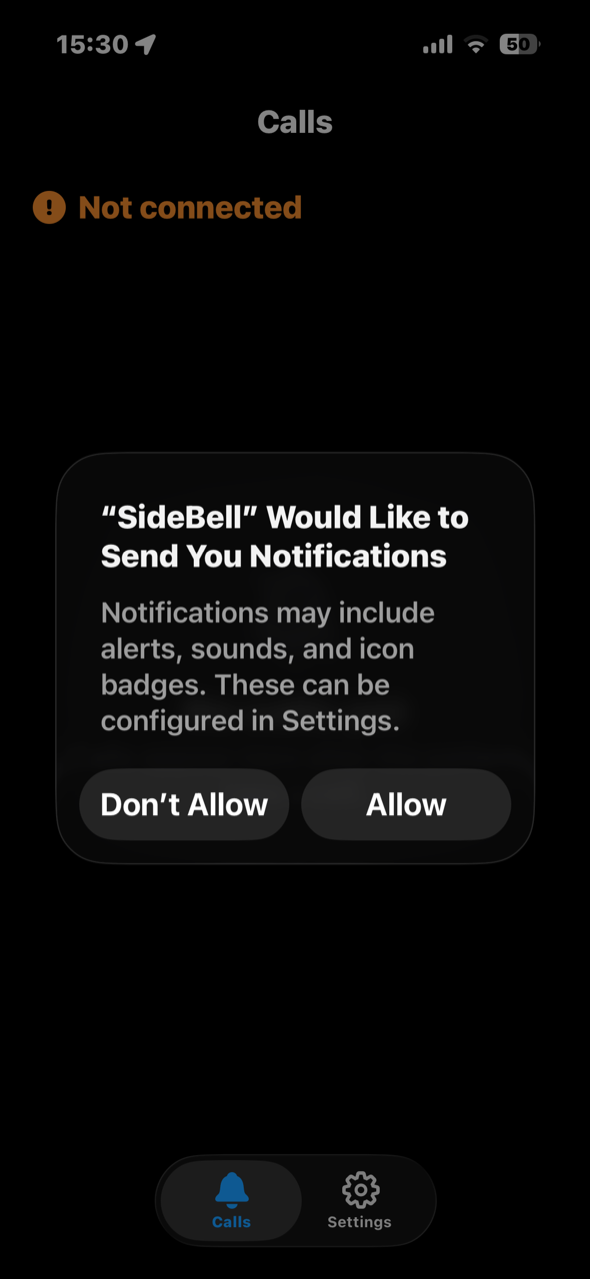
Once the call list opens, iOS asks a second time. The caregiver side needs this one extra permission.
4Check that they are connected
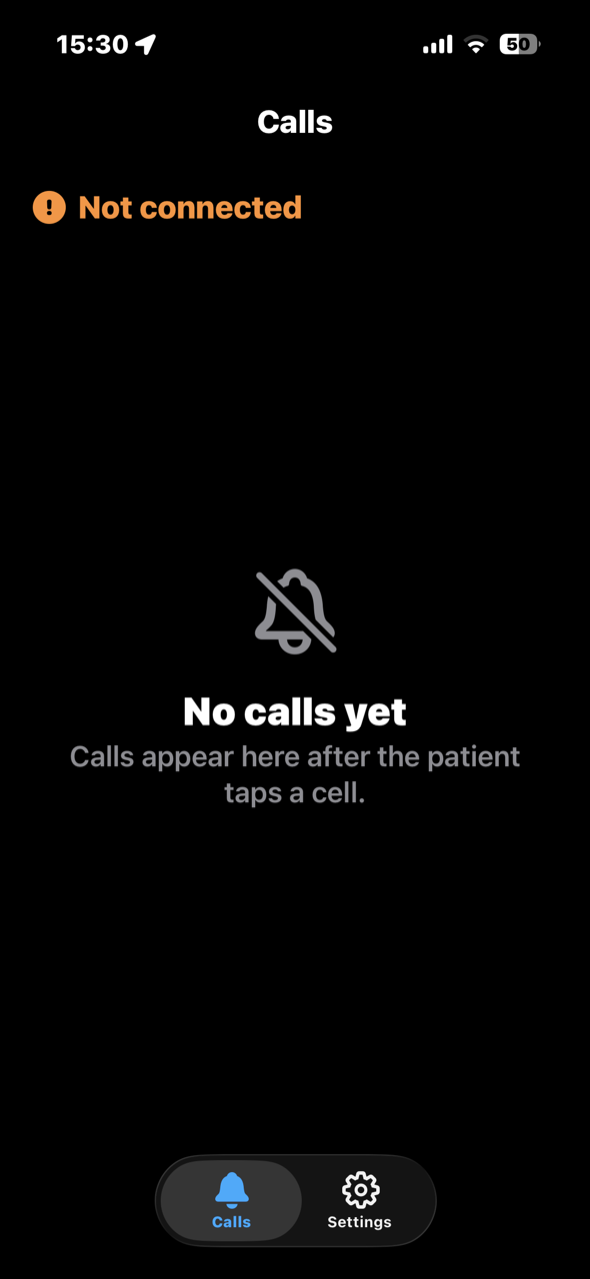
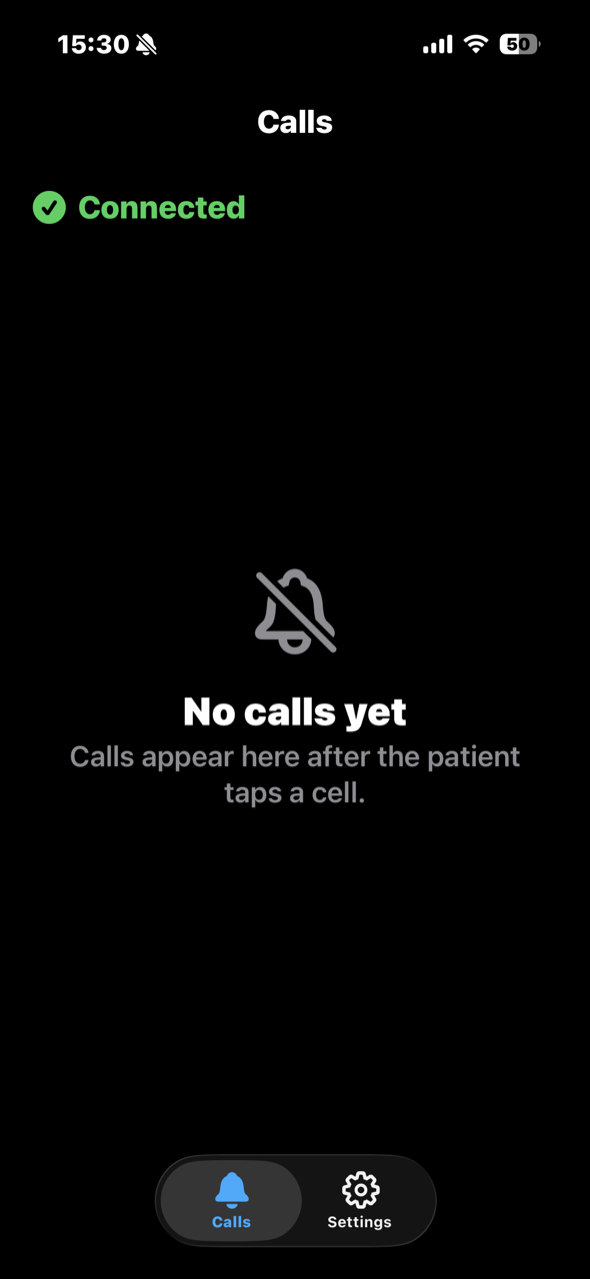
Check the patient side too — its top-left corner should have turned green as well. Both devices green means it is genuinely working. If it is still orange after a minute, see If something is wrong.
5When a call arrives
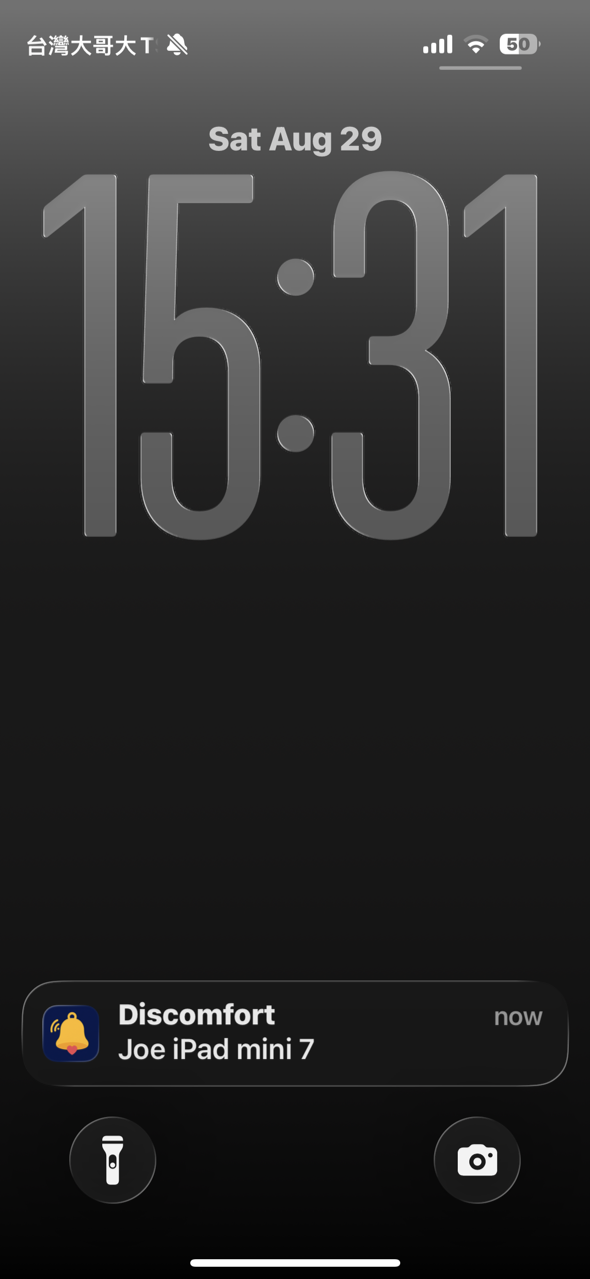
The phone raises an alarm and says the item name aloud, so you know what is needed without looking at the screen.
While the phone is not in use
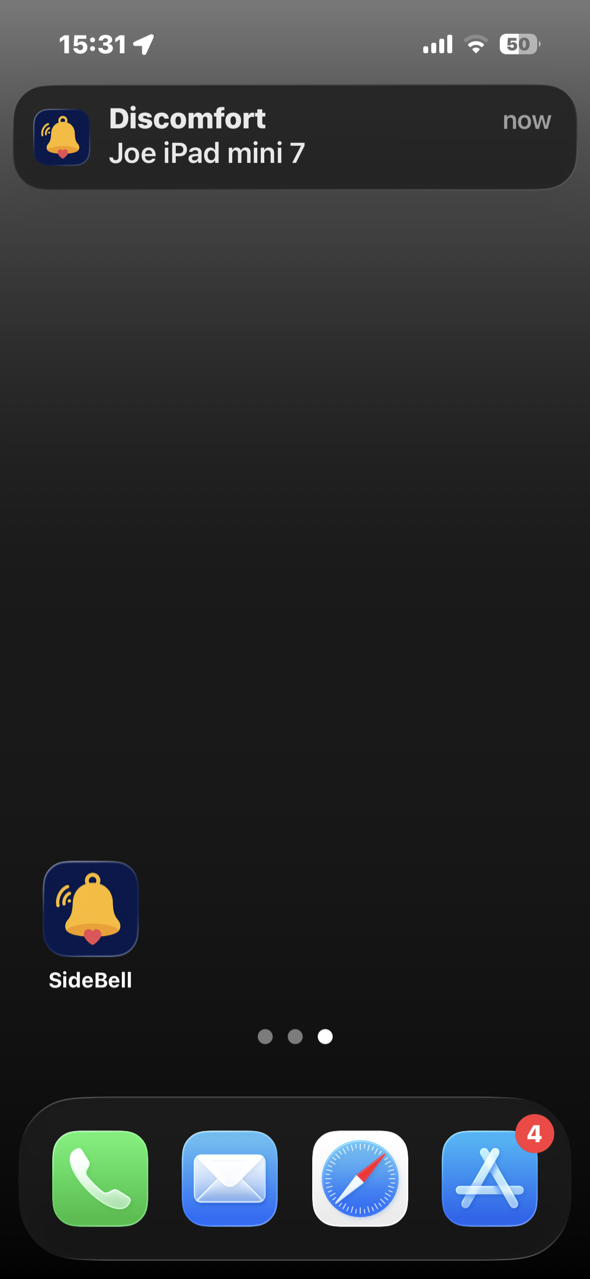
Responding
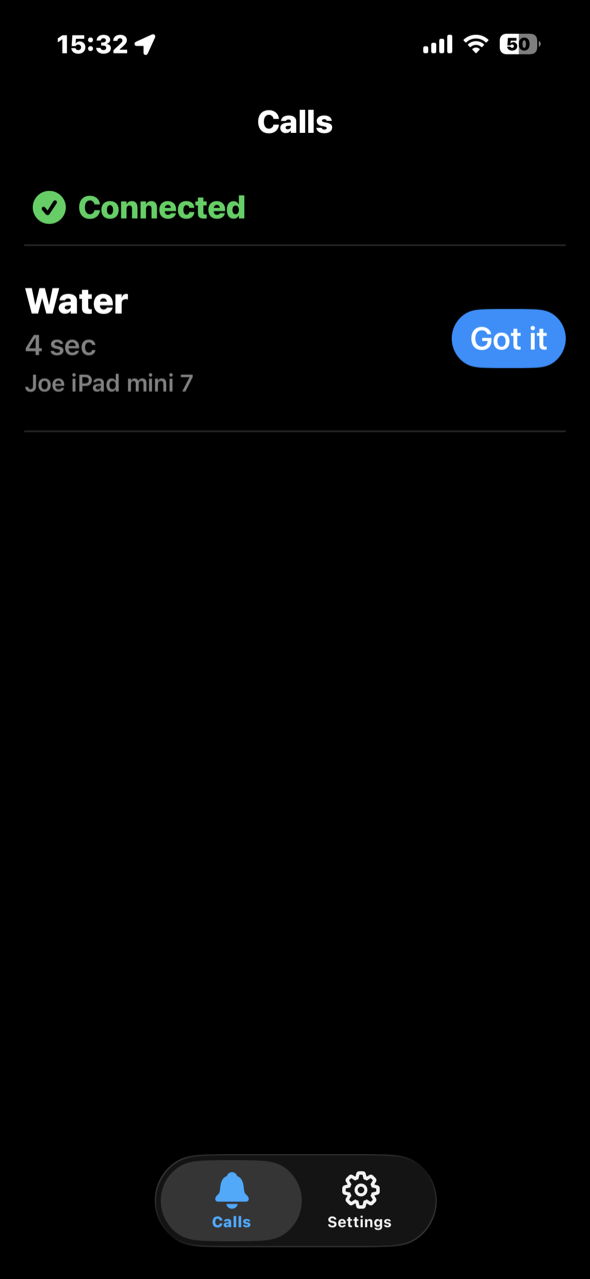
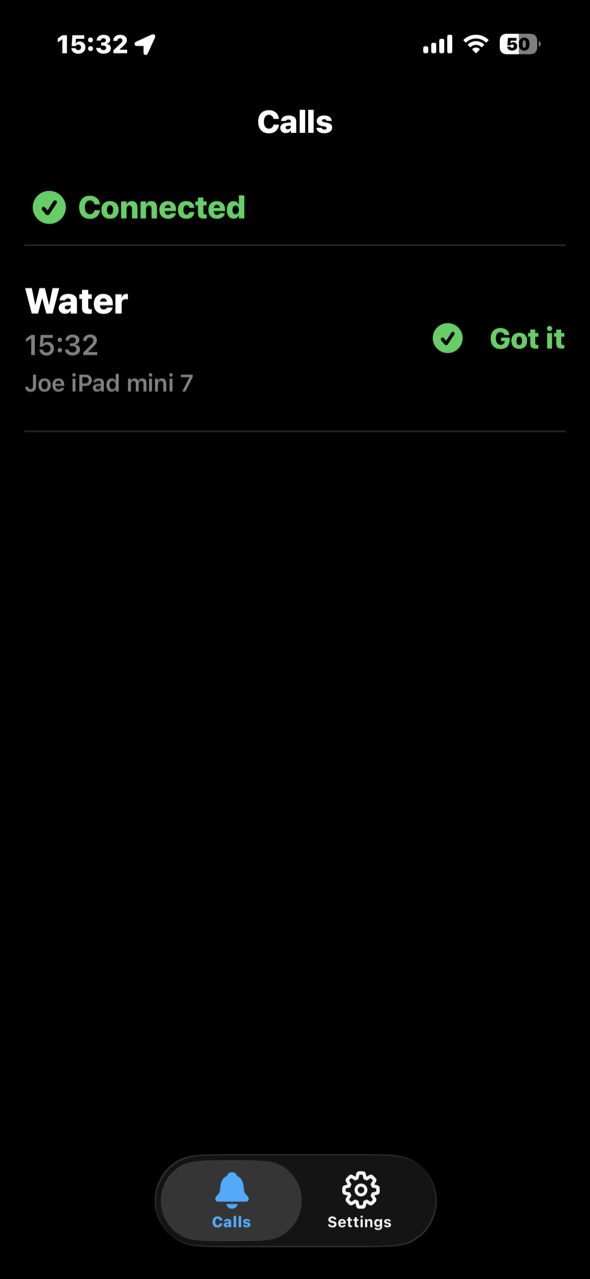
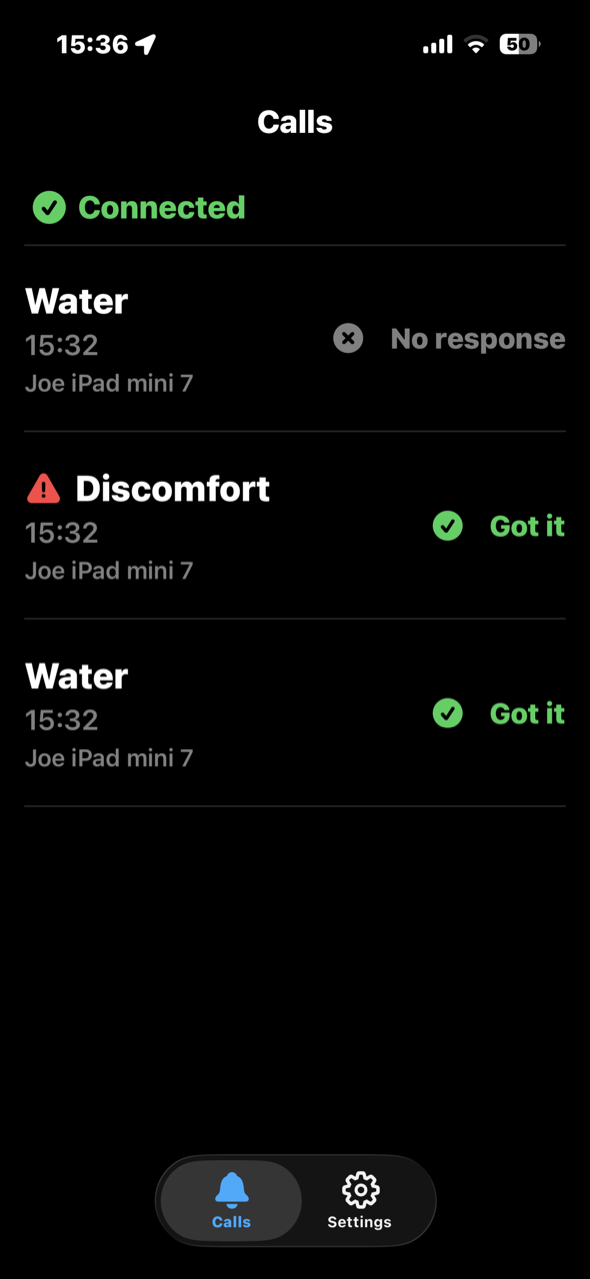
What the list looks like
Two rules
| Discomfort the urgent call |
Every other item | |
|---|---|---|
| The caregiver’s alert | Repeats until someone taps “Got it” or three minutes pass | Sounds once |
| Three minutes with no answer | Becomes “No response” | Also becomes “No response” |
Only “Discomfort” repeats; the three-minute deadline applies to every call. In the “No response” screenshot above, the cell is “Water”.
If something is wrong
It keeps saying “Not connected”
- Is SideBell open on both devices? Swiping the app away from the app switcher stops it working.
- Is Bluetooth on for both? Check iOS Control Centre.
- Too far apart? Put the devices side by side first to confirm they connect, then move them apart to find the range that actually works in your home.
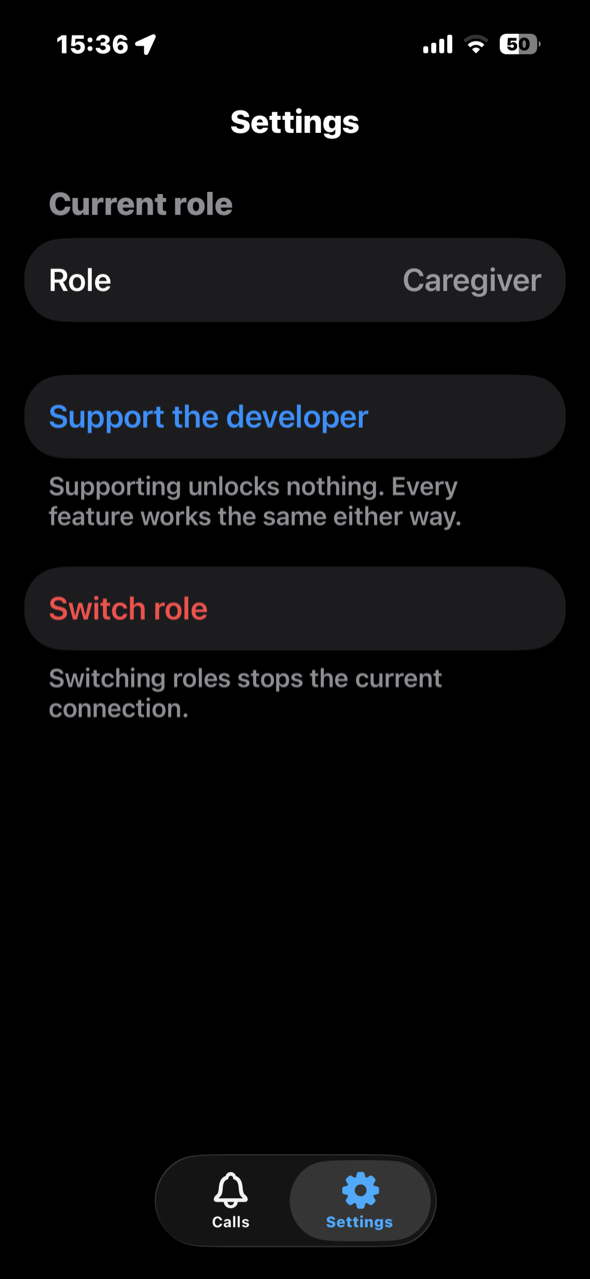
- Did both pick the same role? Two Caregiver devices will never connect. Check the Role row in Settings.
It stays on “Waiting”
The call went out, but the caregiver has not tapped “Got it” yet. After three minutes it becomes “No response”.
“Don’t Allow” was tapped by mistake
iOS only asks once, and the app will never prompt again. Open iOS Settings, scroll down to SideBell, and turn Bluetooth on — plus Notifications on the caregiver side.
Changing devices or swapping roles
Tap the red Switch role in Settings. Switching roles stops the current connection, so check both devices again afterwards.
Still stuck?
Email shinren.pan@gmail.com, or read the source on GitHub. “Support the developer” inside the app is an optional tip that unlocks nothing.