Joe's Blog

iOS 開發筆記

FHIR OAuth Demo

發佈於 2025-03-18
2026-06-14 更新

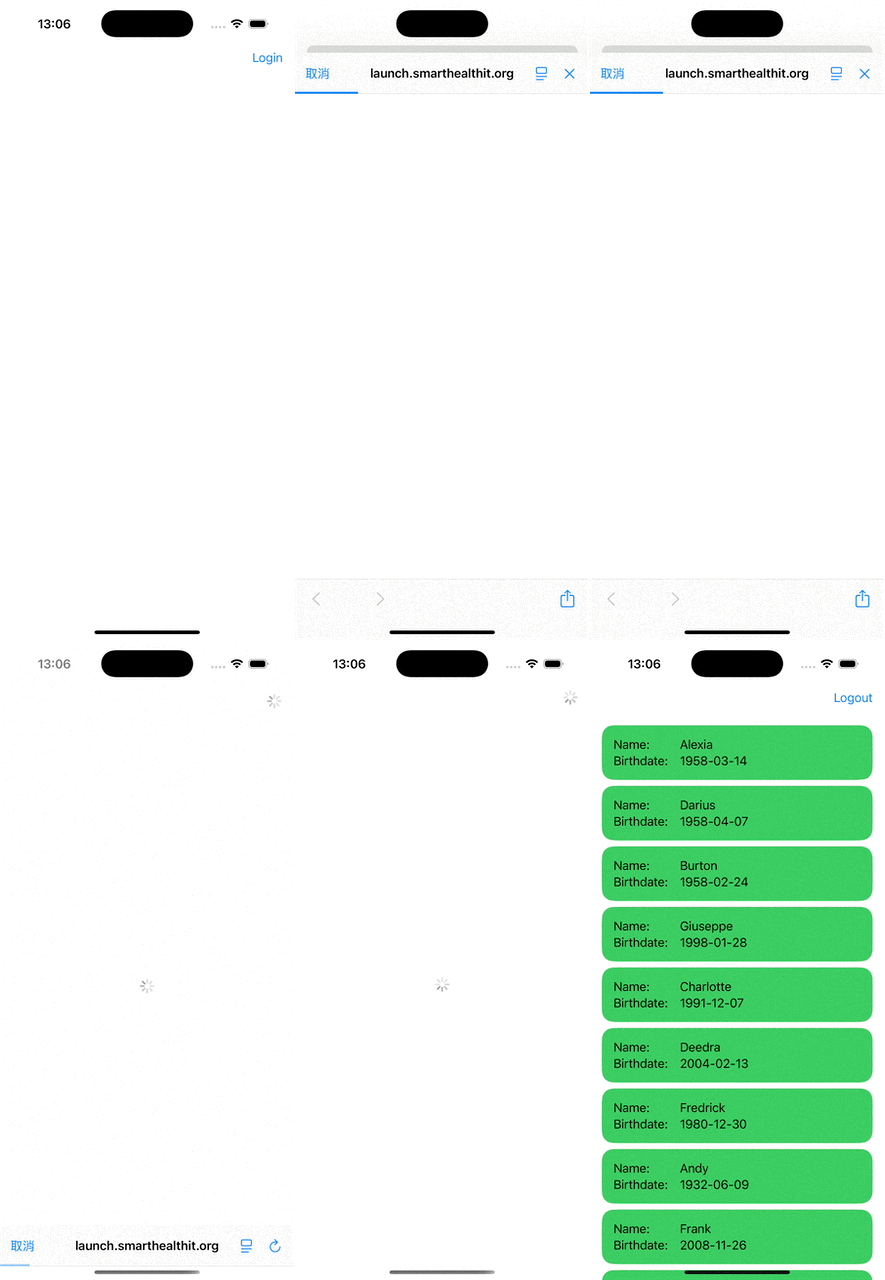
醫療系統的 App 要存取病患資料,繞不開 FHIR。這篇記錄如何用 SMART on FHIR 完成 OAuth 授權,並用 Apple 官方的 FHIRModels 套件解析回傳的資料。

什麼是 SMART on FHIR

流程跟一般的 OAuth Authorization Code Flow 一樣:取得 code → 換 token → 用 token 呼叫 API。


整體流程

sequenceDiagram
    participant App
    participant Browser as ASWebAuthenticationSession
    participant Server as SMART Server

    App->>Browser: 開啟授權 URL
    Browser->>Server: 使用者登入授權
    Server-->>Browser: redirect_uri?code=xxx
    Browser-->>App: callback URL
    App->>Server: POST /token(帶 code)
    Server-->>App: access_token
    App->>Server: GET /fhir/Patient(帶 Bearer token)
    Server-->>App: FHIR Bundle(病患資料)
  

Step 1:建立授權 URL

 1
 2
 3
 4
 5
 6
 7
 8
 9
10
11
12
func makeOAuthURL() -> URL? {
    let authURI = "https://launch.smarthealthit.org/.../auth/authorize"

    guard var components = URLComponents(string: authURI) else { return nil }
    components.queryItems = [
        .init(name: "response_type", value: "code"),
        .init(name: "redirect_uri",  value: "app://"),
        .init(name: "aud",           value: "https://launch.smarthealthit.org/.../fhir"),
        .init(name: "scope",         value: "patient/*.cruds"),
    ]
    return components.url
}

scope: patient/*.cruds 代表要求對所有 Patient 資源的讀寫權限。redirect_uri 用自訂 scheme app://,授權完成後系統會把 callback URL 傳回 App。


Step 2:ASWebAuthenticationSession 完成授權

 1
 2
 3
 4
 5
 6
 7
 8
 9
10
11
12
13
14
15
16
17
// HostController 處理 Router
case let .showOAuthView(url):
    let session = ASWebAuthenticationSession(
        url: url,
        callbackURLScheme: "app"
    ) { [weak self] callbackURL, error in
        guard let self else { return }
        Task {
            if let error {
                await self.viewModel.doAction(.oauth(.failure))
            } else {
                await self.viewModel.doAction(.oauth(.success(callbackURL)))
            }
        }
    }
    session.presentationContextProvider = self
    session.start()

用系統瀏覽器完成授權,不在 App 內嵌入帳密,符合 OAuth 安全規範。授權完成後 callback URL 帶著 code 參數傳回來。


Step 3:用 code 換 token

 1
 2
 3
 4
 5
 6
 7
 8
 9
10
11
12
13
14
func makeTokenURLRequest(code: String) -> URLRequest? {
    var request = URLRequest(url: tokenURL)
    request.httpMethod = "POST"
    request.setValue("application/x-www-form-urlencoded", forHTTPHeaderField: "Content-Type")

    var body = URLComponents()
    body.queryItems = [
        .init(name: "grant_type",   value: "authorization_code"),
        .init(name: "code",         value: code),
        .init(name: "redirect_uri", value: "app://"),
    ]
    request.httpBody = body.query?.data(using: .utf8)
    return request
}

Token endpoint 用 POST + application/x-www-form-urlencoded,這是 OAuth 2.0 的標準格式。


Step 4:用 Apple FHIRModels 解析病患資料

拿到 token 後呼叫 FHIR API,回傳的是一個 FHIR Bundle,裡面包含多筆 Patient 資源。

 1
 2
 3
 4
 5
 6
 7
 8
 9
10
11
12
13
14
import ModelsR4

static func with(_ data: Data) throws -> [Patient] {
    let bundle = try JSONDecoder().decode(ModelsR4.Bundle.self, from: data)
    let patients = bundle.entry?
        .compactMap { $0.resource?.get(if: ModelsR4.Patient.self) } ?? []
    return patients.compactMap { .init(patient: $0) }
}

init(patient: ModelsR4.Patient) {
    self.id        = patient.id?.value?.string ?? UUID().uuidString
    self.name      = patient.name?.first?.given?.first?.value?.string ?? "Unknown"
    self.birthDate = patient.birthDate?.value?.description ?? "Unknown"
}

Apple FHIRModels 把整個 FHIR R4 規範都 model 化了,直接 JSONDecoder().decode(ModelsR4.Bundle.self, ...) 就能解析,不需要自己寫 DTO。


Sandbox 設置

SMART Health IT Sandbox 測試,不需要真實的醫療系統帳號,也不需要註冊 App。

選 Standalone Launch

Sandbox 提供兩種模式:

模式說明
Standalone Launch由 App 主動發起,不需要醫院 EHR 系統的 launch context
Provider EHR Launch從醫院內部系統跳轉過來,帶有 launch token,模擬真實醫療情境

Demo 用 Standalone Launch,流程跟一般第三方 OAuth App 相同。

取得 URL

  1. Standalone Launch
  2. Launch,進入登入頁面後,從瀏覽器網址列複製 URL

URL 格式如下:

https://launch.smarthealthit.org/v/r4/sim/xxxxx/auth/authorize?...
                                              ↑
                                        這段是 Launcher 產生的 config

去掉 /auth/authorize?... 後面的部分,Base URL 就是:

https://launch.smarthealthit.org/v/r4/sim/xxxxx/

程式碼裡的端點對應:

用途URL
Authorization{Base URL}auth/authorize
Token{Base URL}auth/token
FHIR API{Base URL}fhir


Demo


本文使用 Claude 共同完成